
📋 Photographer’s Quick Reference
- Best Overall Season: October–November (crystal skies post-monsoon)
- Second Season: March–May (rhododendron blooms + clear Himalayan views)
- Golden Hour: Sunrise 05:45–07:00 | Sunset 17:30–18:45 (October)
- Camera Risk Zones: Above 4,000m (cold, dust, altitude condensation)
- Permit Required: Thamel street photography none | National Parks entry fee applies
- Best All-Round Lens: 24–70mm f/2.8 for culture; 100–400mm for Himalayan telephoto compression
There is a particular kind of silence in Nepal just before sunrise not the silence of emptiness, but the silence of something enormous preparing to happen.
You feel it on the ridge at Nagarkot, wrapped in a down jacket at 5am, the darkness around you absolute and cold, the horizon still an indistinct black on black. Then, almost imperceptibly, the line where sky meets Himalaya begins to separate a thin thread of amber, then rose, then a burning, incredulous gold that climbs the face of Langtang and Dorje Lakpa and, if the atmosphere cooperates on this particular morning, the distant white pyramid of Everest itself.
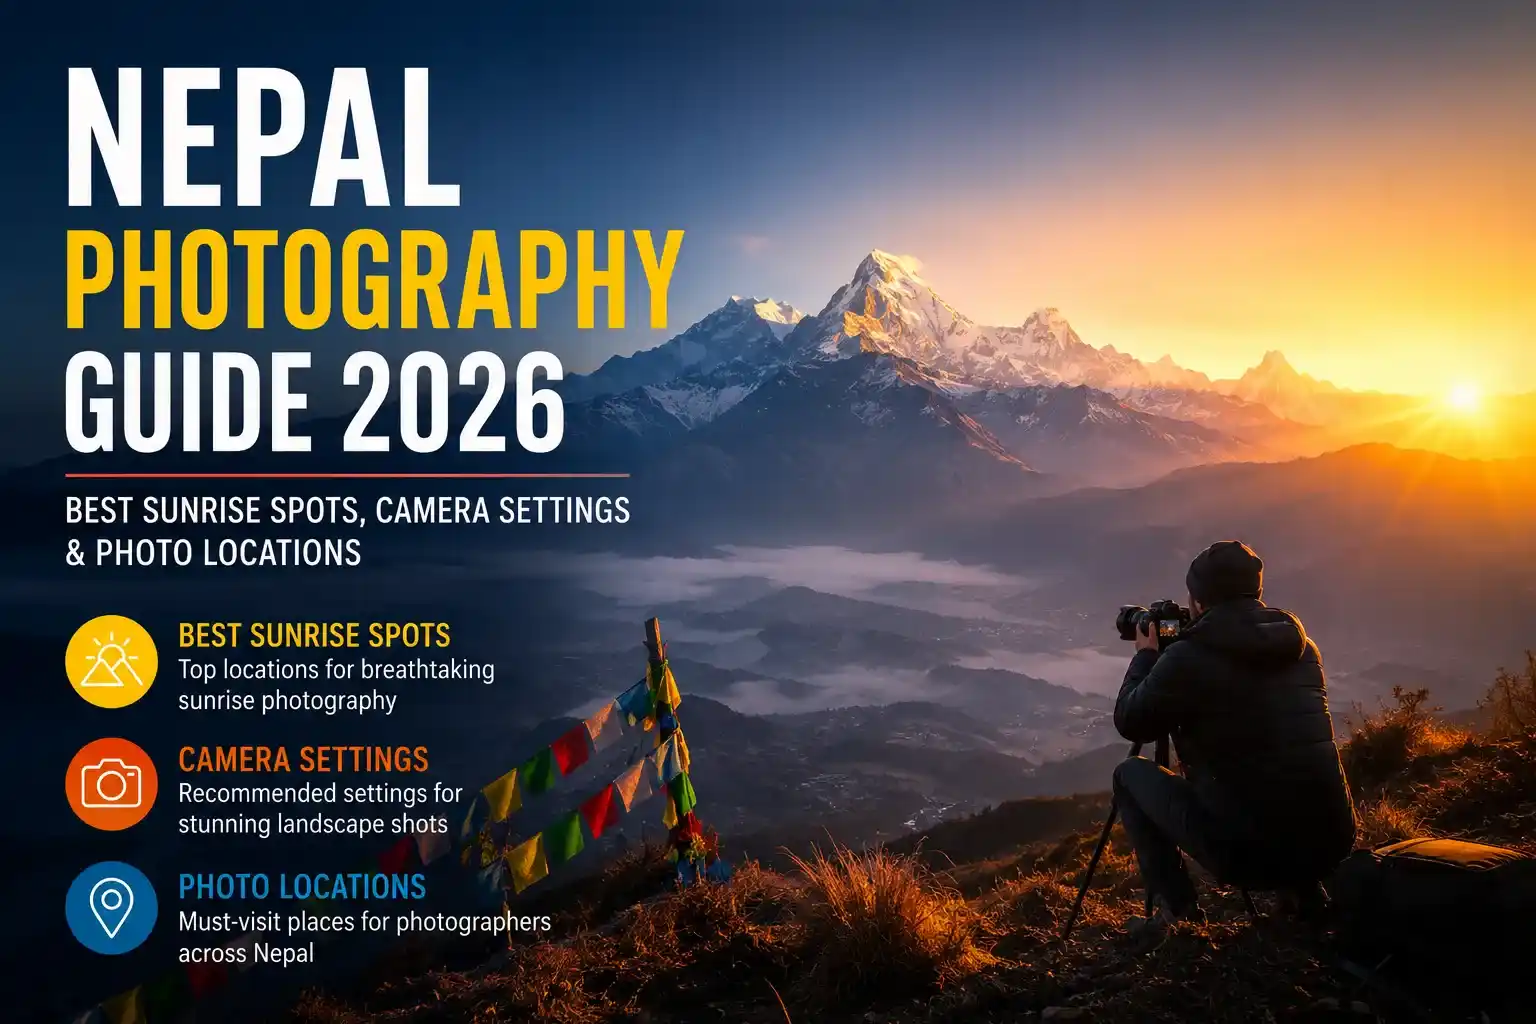
Nepal Photography Guide: How to Capture the Himalayan Kingdom Like a Professional
Your camera is already set up. Your exposure is dialled in. Your tripod legs are locked.
And when that light arrives when the Himalayas ignite you will understand, at a cellular level, exactly why Nepal has been drawing photographers from every corner of the world for generations.
This guide is your complete technical and creative companion for capturing Nepal at its absolute best from the precise camera settings for Himalayan panoramas at altitude, to the exact morning light window for Boudhanath’s dome, to the golden hour lane in Bhaktapur’s Pottery Square that most photographers miss entirely.
Part One: Nepal’s Greatest Sunrise Locations and Photography guide
Nagarkot The Himalayan Horizon Photographer’s Holy Grail
Location: 32km east of Kathmandu | Elevation: 2,195m | Best Time: October–November, March–April
Optimal Shooting Window: 05:30–07:15
Nagarkot sits on the eastern rim of the Kathmandu Valley like a natural observation deck installed by geography specifically for photographers. On a clear day and in October and November, clear days are the rule rather than the exception the panoramic view from Nagarkot’s ridge encompasses over 200km of Himalayan chain, from Dhaulagiri in the west to Kanchenjunga in the east, with Langtang, Dorje Lakpa, Choba Bhamare, Gauri Shankar, and the distant suggestion of Everest filling the middle distance.
It is, without exaggeration, one of the great landscape photography viewpoints on Earth.
Technical Settings for the Nagarkot Sunrise Shot:
The challenge at Nagarkot is exposure management during the transition from pre-dawn darkness to full mountain light a window of roughly 25 minutes where the dynamic range shifts dramatically:
- Pre-sunrise blue hour (05:30–05:50): Use ISO 800–1600, f/4, shutter speed 4–15 seconds on tripod; this produces the most dramatic deep blue sky with the first warmth on peaks
- Alpenglow moment (05:50–06:10): Drop to ISO 400, f/8, adjust shutter to 1/30–1/60 second; the mountain faces catch warm pink-orange light while the valleys remain in shadow this is the decisive exposure moment
- Full sunrise (06:10–07:00): ISO 200, f/11, 1/125–1/250 second; switch to graduated ND filter (3-stop) to balance bright sky against darker foreground
- White balance: Set manually to 3,200–4,500K during alpenglow; auto white balance will underexpose the warmth you came for
Compositional Approaches:
Three compositions work consistently at Nagarkot:
- The classic panorama wide angle (16–24mm), horizontal format, distant Himalayan chain as subject; use foreground pine trees as framing elements on the left or right edge
- Telephoto compression 200–400mm, isolate a single peak group (Langtang massif works beautifully) and compress the layers of ridge and valley into a stacked abstract
- The village context shot include a Nagarkot farmhouse rooftop or prayer flags in the immediate foreground; adds human scale and Nepal’s cultural identity to what might otherwise be a pure landscape
Where exactly to stand: The view tower above the main road offers the most unobstructed panorama. For foreground interest, walk 200 metres north along the ridge path where prayer flag lines stretch between pine trees on still mornings, these create natural leading lines toward the Himalayan horizon.
Sarangkot Annapurna at Its Most Cinematic
Location: 5km northwest of Pokhara | Elevation: 1,592m | Best Time: October–April
Optimal Shooting Window: 05:45–07:30 (sunrise) | 16:30–18:00 (sunset)
If Nagarkot is about panoramic breadth, Sarangkot is about intimate drama. The view here is dominated by the Annapurna Massif Annapurna I (8,091m), Annapurna South, Hiunchuli, Machhapuchhre (the sacred, unclimbed Fishtail Peak) arranged in a horseshoe of ice and rock that curves around the Pokhara Valley like a theatre backdrop.
The distinguishing feature that makes Sarangkot extraordinary for photographers is what sits below those peaks the mirror surface of Phewa Lake, stretching across the valley floor. On calm mornings, the lake reflects the entire Annapurna range with an accuracy that makes the image feel digitally constructed.
The Phewa Lake Reflection Shot Technical Guide:
- Time: This works approximately 45 minutes after sunrise, when light is warm but low enough for the reflection to hold; typically 06:45–07:30
- Location: Do NOT shoot from the Sarangkot viewpoint tower for this; descend to the Phewa Lake shoreline at Damside or Tal Barahi Temple island instead
- Settings: ISO 200, f/11, polarising filter (removes surface glare while preserving the reflection counterintuitively, rotate the polariser until the reflection is most visible, not least), 1/60–1/125 second
- Composition: Place the horizon line at the exact vertical centre of the frame to give equal weight to mountains above and reflection below; this breaks the classic “rule of thirds” compositionally but creates the powerful symmetry this specific shot demands
Sunset at Sarangkot:
The west-facing sunset view from the Sarangkot tower catches the Annapurna chain in alpenglow as the sun sets behind you the peaks shift from white to pale gold to deep amber to rose before the light vanishes. Arrive by 16:00 to claim position.
Kala Patthar The World’s Most Famous Mountain Photography Platform
Location: Khumbu Region, Sagarmatha National Park | Elevation: 5,644m | Best Time: October–November
Optimal Shooting Window: 05:15–06:30 (arrive in darkness; the approach trail requires headlamp)
Kala Patthar literally “Black Rock” in Nepali is the small summit above Gorak Shep from which the most iconic Everest photographs in history have been taken. At 5,644 metres, it places the photographer at eye level with Everest’s famous Southwest Face, with the Khumbu Icefall, Nuptse’s south wall, and the dark pyramid of Everest’s summit visible simultaneously in a single frame.
This is not a casual day-trip photography location. Getting here requires completing the Everest Base Camp trek (or the shorter Gorak Shep approach from Lobuche), which takes 10–14 days from Lukla. But for photographers with the commitment and the fitness, no other mountain photography platform on Earth delivers comparable subject matter.
Critical Technical Considerations at 5,644m:
High altitude introduces photographic challenges that simply do not exist at lower elevations:
- Battery drain: Cold temperatures at Kala Patthar (frequently -15°C to -25°C before dawn) reduce battery capacity by 40–60%. Carry minimum three fully charged batteries kept warm inside your inner jacket the night before; swap batteries every 15–20 minutes of shooting
- Condensation: When you move from cold exterior to warm teahouse and back, condensation forms on and inside lens elements. Always allow camera gear to acclimatise gradually place your camera bag in the teahouse porch or vestibule (not inside) for 20 minutes before bringing it fully indoors
- Sensor performance: At extreme cold, some mirrorless cameras show increased noise at high ISO; test your specific body’s cold-weather performance on lower-altitude pre-dawn shoots during the trek approach
- Focusing: Manual focus confirmation at altitude with gloves is difficult; pre-set your focus distance the evening before using Live View magnification on a bright star; tape the focus ring with gaffer tape to prevent accidental movement overnight
Everest Sunrise Settings Kala Patthar:
- ISO: 800–1600 pre-sunrise; reduce to 200–400 as full light establishes
- Aperture: f/8–f/11 for maximum sharpness across the full mountain face
- Shutter: 1/15–1/60 second on tripod pre-sunrise; 1/250–1/500 second in full light
- Focal length: 70–200mm range captures Everest with meaningful compression without losing context; 24–35mm for the wide environmental shot including Khumbu Icefall
Part Two: Shooting Boudhanath at Dawn and Dusk
Location: Boudha, Kathmandu | Elevation: 1,400m | Best Time: Year-round; October–November for clearest skies
Dawn Window: 05:30–07:00 | Dusk Window: 17:00–18:30
Boudhanath Stupa the largest stupa in South Asia and a UNESCO World Heritage Site is one of the most photographed structures in Asia. Which creates an immediate challenge: how do you photograph something this iconic in a way that feels fresh, personal, and genuinely yours?
The answer is almost entirely about timing and position.
Dawn at Boudhanath The Hour of the Devotees
The stupa opens to the public from approximately 05:00. Arrive at 05:30 an hour before most tourists and at least 90 minutes before tour groups arrive. What you find in this window is not a monument but a living spiritual landscape.
Buddhist devotees from the surrounding Tibetan and Newari communities perform the kora the clockwise circumambulation of the stupa beginning before first light. Monks in burgundy robes, elderly Tibetan women spinning hand prayer wheels, incense smoke rising in columns through the pre-dawn stillness, butter lamps burning in small alcoves this is the visual reality of Boudhanath that the midday crowd never sees.
Dawn Technical Settings:
- ISO: 1600–3200 pre-dawn light is low and you need to freeze subtle movement without tripod (tripods are restricted inside the stupa courtyard at peak hours; pre-dawn access is more flexible verify current rules at the gate)
- Aperture: f/2.8–f/4 to gather light; the shallow depth of field also beautifully separates devotees from the stupa background
- Shutter: 1/60–1/125 second to manage motion while maintaining exposure
- White balance: 3,200K (tungsten) to render butter lamp and incense light in warm amber tones; auto WB will cool the scene unnaturally
- Lens: 35mm or 50mm prime for intimate street-scale compositions; the human element at this focal length gives the stupa its correct architectural scale
The Rooftop Shot: The restaurants and café terraces surrounding the stupa offer elevated viewpoints that transform the composition entirely. The Stupa View Rooftop Café opens early enough to shoot the dome from above during golden hour the perspective reveals the concentric rings of prayer wheels and the mandala geometry of the stupa base that ground-level shooting misses entirely. Best light hits the dome face from the east side at sunrise; shift to the west side at sunset.
Dusk at Boudhanath Lighting and Ceremony
The dusk window (17:00–18:30) brings a different but equally powerful atmosphere. As natural light fades, the stupa’s illumination takes over warm floodlights catch the whitewashed dome while the sky transitions through shades of indigo and violet. The evening kora begins as the day’s business ends, and the courtyard fills again.
- The eyes of the Buddha: The painted eyes on the stupa’s harmika (the cube above the dome) are the most recognisable element in Nepal photography. Shoot them with a 200mm+ telephoto from across the courtyard, framed against the evening sky, during the 10-minute window when ambient sky and artificial lighting reach equilibrium typically 17:45–18:00 in October
Part Three: Bhaktapur Golden Hour Locations
Location: 13km east of Kathmandu | Elevation: 1,401m | Best Time: October–November, February–April
Morning Window: 06:00–08:30 | Afternoon Window: 15:30–17:30
Bhaktapur is, for many travel photographers, the single most rewarding urban photography destination in Asia. The medieval Newari city a UNESCO World Heritage Site has preserved its brick-paved streets, tiered pagoda temples, and traditional courtyard architecture with extraordinary integrity. In golden hour light, its warm brick tones glow with a quality that no filter or post-processing can manufacture.
The Four Golden Hour Locations in Bhaktapur
1. Pottery Square (Kumale Tole) Morning Only
Arrive at 06:30 when potters begin work. The combination of spinning wheels, clay-dusted hands, rows of drying pots, and low morning light raking across terracotta surfaces creates compositions of extraordinary warmth and texture. Position yourself low shooting slightly upward against the potters and the tiered temples behind them creates depth and grandeur simultaneously.
- Settings: ISO 400, f/5.6, 1/125 second; polarising filter to deepen the blue sky behind the temples
- Focal length: 35–50mm for environmental portraits; 85mm for tighter craftsperson detail shots
2. Nyatapola Temple Steps Early Morning & Late Afternoon
The five-tiered Nyatapola Temple Bhaktapur’s tallest and most architecturally dramatic structure catches the best light from the east side at sunrise and the west side at sunset. The stone guardian figures flanking the steep staircase wrestlers, elephants, lions, griffins, goddesses are among Nepal’s finest sculptural subjects.
- Golden hour eastern light: Illuminates the full façade from 07:00–08:00 in October; the warm light on carved stone wood details of the roof struts is extraordinary
- Settings: ISO 200, f/8, 1/250 second in full golden hour; bracket exposures ±1 stop
3. Dattatraya Square The Photographers’ Secret
While Bhaktapur’s Durbar Square receives the majority of visitors, Dattatraya Square at the eastern end of the old city remains quieter and, in many ways, more photogenic. The 15th-century Dattatraya Temple, the Pujari Math courtyard with its famous Peacock Window, and the surrounding domestic architecture create a layered, lived-in streetscape.
- Best time: 07:00–08:30 when slanted morning light creates dramatic shadows across carved wooden screens and brick facades
- The Peacock Window: Nepal’s most celebrated wood carving; shoot it with a 100mm macro or equivalent in soft diffused morning light (avoid direct sunlight on the carving side light reveals the finest detail)
4. Tachupal Tole Side Streets Late Afternoon
The narrow lanes radiating from Dattatraya Square are virtually unknown to casual tourists but in late afternoon light (15:30–17:00), when golden sunlight penetrates the lane openings at a low angle and illuminates the brick dust in the air, these alleys produce some of the finest street photography available anywhere in Nepal.
Part Four: Camera Gear Recommendations for Nepal
The Core Nepal Photography Kit
Selecting gear for Nepal requires balancing image quality against physical practicality you may be carrying equipment across altitude ranges from 100m to 5,644m, in temperatures from 35°C in the Terai to -25°C on Kala Patthar.
Camera Bodies:
- Primary recommendation: Full-frame mirrorless Sony A7R V, Nikon Z8, Canon EOS R5 for dynamic range in high-contrast mountain light and low-light performance in temple interiors
- Alternative: APS-C mirrorless Fujifilm X-T5, Sony A6700 lighter and more compact; excellent for trekking photography where weight is a genuine consideration
- Always bring a backup body dust, humidity, altitude, and the occasional stumble on a stone-paved Bhaktapur alley make redundancy essential
Lens Selection:
| Lens | Focal Range | Primary Use |
|---|---|---|
| Wide zoom | 16–35mm f/2.8 | Temple interiors, Boudhanath courtyard, Bhaktapur street scenes |
| Standard zoom | 24–70mm f/2.8 | Versatile everyday; covers 80% of cultural photography situations |
| Telephoto zoom | 100–400mm f/4.5–5.6 | Himalayan panoramas, wildlife, compressed mountain layers |
| Prime | 50mm or 85mm f/1.8 | Low-light devotee portraits at Boudhanath, Pashupatinath |
Essential Accessories:
- ✅ Carbon fibre tripod lighter than aluminium; essential for pre-dawn Nagarkot and Kala Patthar shots
- ✅ Graduated ND filters (2-stop & 3-stop) mandatory for balancing bright Himalayan sky against darker foreground
- ✅ Circular polarising filter for Phewa Lake reflections, deep blue skies above white peaks
- ✅ Sensor cleaning kit Himalayan dust is pervasive; clean your sensor every 3–4 days
- ✅ Minimum 4 batteries per body cold temperatures drain batteries at altitude faster than any other variable
- ✅ Weatherproof camera bag monsoon shoulder season and sudden high-altitude weather changes happen without warning
- ✅ Silica gel sachets combat condensation inside your camera bag during altitude transitions
- ✅ Hand warmers tape one to each battery in your jacket pocket the night before a cold-weather shoot
Season & Time of Day Master Reference
| Location | Best Season | Best Light Time | Key Shot | Settings Starting Point |
|---|---|---|---|---|
| Nagarkot | Oct–Nov | 05:30–06:30 | Himalayan alpenglow panorama | ISO 800, f/8, 1/30s, tripod |
| Sarangkot | Oct–Apr | 05:45–07:30 | Annapurna + Phewa reflection | ISO 200, f/11, polariser |
| Kala Patthar | Oct–Nov | 05:15–06:30 | Everest sunrise face | ISO 1200, f/9, 1/60s, tripod |
| Boudhanath Dawn | Year-round | 05:30–07:00 | Kora devotees + dome | ISO 2000, f/2.8, 1/100s |
| Boudhanath Dusk | Year-round | 17:45–18:15 | Buddha eyes + evening sky | ISO 800, f/5.6, 1/60s |
| Bhaktapur Pottery | Oct–Apr | 06:30–08:30 | Potters at wheel + temples | ISO 400, f/5.6, 1/125s |
| Bhaktapur Streets | Oct–Apr | 15:30–17:30 | Lane light + brick facades | ISO 800, f/4, 1/200s |
| Annapurna foothills | Mar–May | 06:00–07:30 | Rhododendron + peak backdrop | ISO 200, f/8, 1/250s |
One Last Frame
Nepal will make you a better photographer not because the subjects are easy, but because they demand that you slow down, pay attention, and earn the image.
The light on Kala Patthar lasts four minutes. The kora at Boudhanath happens whether you’re there or not. The potters of Bhaktapur arrive whether you set your alarm or not.
Nepal does not perform for cameras. It simply exists ancient, unhurried, magnificent and the photographers who return with the greatest images are always the ones who arrived early, stayed late, and respected the quiet between the frames. 🏔️
Planning your Nepal photography trip? Explore All About Nepal connects you with specialist photography guides, sunrise viewpoint logistics, and the precise seasonal windows that make the difference between a good shot and an extraordinary one.
